A garage door remote that stops working can throw off your entire routine. One moment, everything is fine, and the next, you are stuck in the driveway, wondering what went wrong. The good news is that most remote issues can be traced back to a handful of common causes, and many of them can be addressed at home without any special tools or technical experience.
This guide walks you through a clear, step-by-step troubleshooting process so you can quickly identify the problem, handle what you can on your own, and know exactly when it is time to call in a professional.

Start With the Battery
Before anything else, check the battery. This is the most overlooked step in garage door remote troubleshooting, and it is also the one that resolves the problem most of the time. A battery that is running low may not be completely dead, but it can cause the remote to behave inconsistently or lose range.
What to Do
- Remove the battery from the remote and inspect the contacts for any signs of corrosion or buildup.
- Replace the battery with a brand new one, using the correct type for your remote model, typically a 12-volt or 9-volt.
- Test the remote immediately after replacing the battery to see if performance improves.
- If the remote works normally after a fresh battery is installed, the issue is resolved.
- If performance does not improve, move on to the next step.
If you are still trying to figure out what triggered the issue in the first place, our guide on Garage Door Remote Not Working? Possible Reasons Why is a great place to start before diving into troubleshooting.
Check the Range and Position
If a new battery did not resolve the issue, the next step is to test the remote from different distances and angles. Sometimes the problem is not with the remote itself but with how and where it is being used.
What to Do
- Stand directly in front of the garage door and press the remote button. Note whether the door responds.
- Gradually move closer to the garage and test again. If the remote only works at very close range, there may be a signal or antenna issue.
- Try pointing the remote in slightly different directions to rule out a directional interference problem.
- Test the remote at different times of day, as some wireless interference sources vary depending on the time or usage patterns in the area.
- If the range seems significantly reduced compared to before, move on to checking for interference.
Look for Sources of Signal Interference
Garage door remotes operate on radio frequencies, and those frequencies can be disrupted by a surprising number of everyday devices. Identifying and removing the source of interference is one of the most effective troubleshooting steps a homeowner can take.
What to Do
- Check whether any new electronic devices have been added to the garage or nearby areas recently, including LED bulbs, wireless routers, baby monitors, or security cameras.
- If your garage opener uses an LED bulb, try swapping it out for an incandescent bulb or an opener-compatible LED. Certain LED bulbs emit radio frequency noise that directly interferes with remote signals.
- Turn off nearby wireless devices temporarily and test the remote to see if performance improves.
- If you recently moved the router or added new smart home equipment, try relocating those devices away from the garage area.
- Persistent interference issues may require a professional to assess whether a frequency adjustment or antenna upgrade is needed.
Inspect the Opener’s Antenna
The antenna on your garage door opener is what receives the signal from the remote. If it is bent, obstructed, or damaged, even a perfectly functioning remote will struggle to communicate with the opener. This is a quick visual check that takes less than a minute.
What to Do
- Locate the antenna wire on the motor unit of your opener. It is typically a thin wire that hangs down from the unit.
- Make sure the wire is hanging straight and is not coiled, bent, or tucked against the unit.
- Check for any visible damage along the wire, including fraying, kinks, or breaks.
- Clear away any boxes, shelving, or stored items that may be blocking the antenna’s path toward the garage entrance.
- If the antenna wire appears damaged, contact a garage door professional for a replacement. Do not attempt to splice or repair antenna wiring on your own.
If the antenna wire is damaged, it’s best to contact a garage door repair professional for replacement. Avoid attempting to splice or repair the antenna yourself, as improper repairs can lead to further issues with the opener.
Re-Sync the Remote to the Opener
If the battery, range, interference, and antenna have all been checked and the remote still is not responding, the next step is to re-sync it to the opener. Remotes can lose their programming after a power outage, a surge, or simply over time.
What to Do
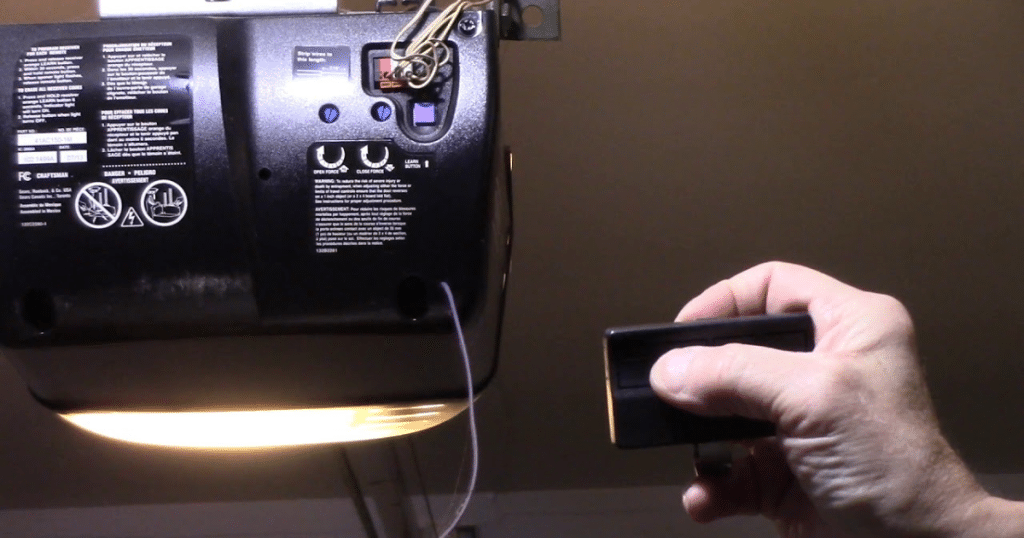
- Locate the “Learn” button on your garage door opener motor unit. It is usually found on the back or side of the unit and may be covered by a light cover panel.
- Press and release the “Learn” button. Most openers will have an indicator light that turns on or begins blinking to signal it is in pairing mode.
- Within 30 seconds, press and hold the button on your remote until the opener’s light blinks or you hear two clicks, which confirms the remote has been successfully re-paired.
- Test the remote to confirm the door responds.
- If the re-syncing process does not work after two attempts, refer to your opener’s manual for model-specific instructions or contact the manufacturer’s support line.
If the remote still doesn’t sync after a couple of attempts, consult your opener’s manual for model-specific instructions or contact the manufacturer’s support team. If issues persist, a garage door opener repair professional can diagnose and resolve deeper system problems.
For homeowners who want a broader understanding of how the opener’s Learn button and pairing system work across different models, Family Handyman’s garage door opener installation guide is a practical visual reference worth reviewing alongside these steps.
Test the Wall-Mounted Button
Testing the wall button is a critical diagnostic step that helps you quickly determine whether the problem is with the remote specifically or with the opener system as a whole.
What to Do
- Press the wall-mounted button inside your garage and observe whether the door opens or closes normally.
- If the wall button works but the remote does not, the opener itself is functioning correctly, and the issue is isolated to the remote, its battery, its programming, or a signal problem.
- If neither the wall button nor the remote works, the issue may be with the opener’s power supply, logic board, or wiring, which requires a professional inspection.
- If the wall button works inconsistently, check the wiring connections between the button and the opener for any looseness or damage.
Check the Safety Sensors
Safety sensors sit near the base of your garage door tracks and are designed to stop the door from closing if something is in the way. When they are misaligned or obstructed, they can cause the entire system to behave unexpectedly, which can sometimes look like a remote issue even when it is not.
What to Do
- Locate the two sensors at the bottom of the door tracks, one on each side.
- Check the indicator lights on both sensors. Both lights should be solid, not blinking.
- A blinking light on either sensor typically means they are out of alignment or something is blocking the beam between them.
- Wipe both sensor lenses gently with a clean, dry cloth to remove any dust or debris.
- Carefully adjust the sensor brackets so both units are directly facing each other until the indicator lights turn solid.
- Keep the area around the sensors clear of tools, boxes, or any items that could break the sensor beam.
Safety sensors are required on all modern residential openers under the automatic garage door safety standards that govern installations across the country, which is why keeping them clean and properly aligned is not optional.
Reset the Opener
If you have worked through all the steps above and the remote is still not responding, a full reset of the opener may clear any underlying programming or system errors that are causing the problem.
What to Do
- Unplug the garage door opener from the power outlet and wait at least 60 seconds before plugging it back in.
- After power is restored, re-sync your remote using the “Learn” button process outlined in Step 5.
- Test the remote to see if the reset resolved the issue.
- If your opener has a dedicated reset button, refer to the manual for the correct reset procedure for your specific model.
- Keep in mind that a full reset will erase all previously paired remotes and keypads, so you will need to re-program each one after the reset is complete.
Assess Whether the Remote Itself Needs to Be Replaced
After working through every troubleshooting step, if the remote is still not functioning reliably, the unit itself may simply be at the end of its useful life. Remotes that have been dropped, exposed to moisture, or used heavily for many years will eventually stop working regardless of how well they are maintained.
What to Do
- Borrow or purchase a compatible replacement remote and test it with your opener to confirm the opener is functioning correctly.
- If the replacement remote works without any issues, the original remote is the problem and should be replaced.
- Contact your opener’s manufacturer or a licensed garage door professional to source the correct replacement model for your system.
- Average replacement costs vary depending on the opener brand and model, so it is worth checking with a professional before purchasing a universal alternative.
To understand the full picture of when replacement makes more sense than continued troubleshooting, our guide on Signs It’s Time to Replace Your Garage Door Remote covers every warning sign in detail.
Know When to Stop and Call a Professional
There is a clear point in the troubleshooting process where continuing on your own stops being productive and starts creating risk. Certain garage door opener components, including the logic board, internal wiring, and motor assembly, require professional training and tools to diagnose and address safely.
When to Make the Call
- You have completed every step in this guide and the remote is still not working.
- The wall button is also unresponsive, which points to a deeper opener issue beyond the remote.
- The opener is making unusual sounds, flickering, or showing error codes.
- You notice burning smells, visible damage to the motor unit, or exposed wiring inside the opener housing.
- The opener is more than 10 to 15 years old and has been experiencing multiple issues at once.
Oklahoma City homeowners dealing with remote or opener problems should not wait too long before reaching out to a professional. The region’s seasonal weather, including spring storms and intense summer heat, can accelerate wear on garage door systems in ways that are not always visible until a larger problem develops. Staying ahead of those issues with regular professional check-ins is always the smarter approach.
If you want to get ahead of future problems entirely, our guide on Garage Door Remote Maintenance Tips to Avoid Issues is the perfect next read.

You Do Not Have to Figure It All Out on Your Own
Troubleshooting a garage door remote at home is manageable when you have the right steps in front of you. Working through the process systematically, from the battery all the way to a full opener reset, gives you the best chance of resolving the issue quickly and without unnecessary expense. Most of the time, the solution is simpler than it first appears.
When the steps in this guide have been exhausted and the problem persists, or when you simply want a professional set of eyes on your system, CCM Overhead Doors has the experience and the local knowledge to get your garage door operating the way it should. Our technicians understand Oklahoma City homes, the wear that comes with the seasons here, and what it takes to get your system back on track fast. Contact us or give us a call today to schedule your visit.