Learn how to replace your garage door opener battery safely and in minutes. Follow our easy guide to avoid remote issues and stay secure.
Is your garage door remote not working correctly? Before you call for professional help, it may need a simple battery replacement. Learning how to replace garage door opener batteries correctly can save you time and money. CCM Overhead Doors experts recommend regular battery maintenance to ensure your garage door operates smoothly and safely. This comprehensive guide will walk you through the entire process, from identifying the correct battery to troubleshooting common issues after replacement.

Why Battery Maintenance Is Crucial for Garage Door Safety
The battery in your garage door remote serves as the lifeline for convenient access to your home. When functioning correctly, it sends a clear signal to your garage door opener, allowing for seamless entry and exit. However, when batteries begin to fail, this convenience quickly transforms into a frustrating and potentially dangerous situation.
A dead or dying battery compromises more than convenience—it affects your home’s security. Unreliable operation means you might not be certain if your garage door has wholly closed when leaving your home, creating a vulnerable entry point for potential intruders. Additionally, a functional remote ensures quick access to your vehicle and escape route in emergencies.
Watch for these telltale signs that indicate it’s time for a battery replacement:
- Remote works inconsistently or only at a very close range
- Need to press buttons multiple times for response
- The garage door opens or closes sluggishly
- The LED indicator on the remote is dim or doesn’t light up
- Remote hasn’t had a battery replacement in over a year
What Type of Battery Does Your Garage Door Remote Use?
Before rushing to replace your remote’s battery, it’s essential to identify the correct type needed for your specific model. Different manufacturers design their remotes to operate with particular battery types, and using the wrong one could damage your device or prevent proper functioning.
Common Battery Types by Remote Brand
| Brand | Remote Model Examples | Battery Type | Replacement Frequency |
| LiftMaster | 371LM, 891LM, 893MAX | CR2032 | Every 1–2 years |
| Chamberlain | KLIK1U, 953EV, 940EV | CR2032 | Annually |
| Genie | G3T-R, GITR-3, GUK-BX | A23 | 12–18 months |
| Craftsman | 139.53776, 139.53753 | CR2032 | 1–2 years |
| Overhead Door | O3T-BX, OCDTR-3 | CR2032 | Every 1–2 years |
Most modern garage door remotes use coin-style CR2032 batteries or smaller A23 batteries. If you’re unsure which type your remote requires, check your user manual or look for markings on the old battery once it has been removed.
Tools You’ll Need for a Safe Battery Replacement
Gathering the proper tools before beginning the replacement process ensures a smooth experience and prevents potential damage to your remote. Here’s what you’ll need:
- Mini screwdriver (flathead or Phillips, depending on your remote model)
- Clean microfiber cloth for wiping contacts
- Replacement battery (verified correct type for your model)
- Gloves for safe handling (optional but recommended)
Having these items readily available before starting will make the process faster and more efficient. The microfiber cloth is significant as it lets you clean contact points without leaving behind fibers or moisture that could interfere with connections.
Step-by-Step: How to Replace Garage Door Opener Battery
Following these simple steps will ensure a quick and successful battery replacement:
Step 1: Open the battery cover. Depending on your remote model, you’ll either need to slide the cover in the direction indicated by arrows on the back of the remote or unscrew a small panel. Apply gentle pressure—forcing the cover to crack the plastic housing.
Step 2: Remove the old battery carefully. Note how the battery is positioned before removing it. Some remotes have a small notch or tab that makes removal easier. If the battery is stuck, gently tap the remote against your palm to loosen it rather than using metal tools that could damage the circuit board.
Step 3: Insert the new battery (check polarity). Pay close attention to the positive (+) and negative (-) markings inside the remote and on the battery. Incorrect installation prevents the remote from working and could damage its internal components.
Step 4: Close the cover tightly and ensure it clicks back into place securely. Any gaps could allow moisture or debris to enter, potentially causing corrosion or malfunction.
Step 5: Test the remote with the garage door. Press the button to verify the new battery functions properly on the remote.
Pro Tip: If your garage door doesn’t respond immediately after battery replacement, wait 30 seconds and try again before troubleshooting. Some remotes require a brief initialization period after power restoration.
Troubleshooting a Non-Responsive Remote After Battery Replacement
If your remote still doesn’t work after replacing the battery, try these troubleshooting steps before seeking professional assistance:
Check battery polarity. Even careful installation can sometimes result in reversed polarity. Remove the battery and double-check that it’s inserted according to the markings inside the remote.
Inspect for corroded contacts. Over time, old batteries can leak and cause corrosion on the metal contacts inside your remote. Look for any white, green, or blue residue on the battery terminals.
Clean the contacts. If you notice corrosion, gently clean the contacts with a dry cotton swab. For stubborn corrosion, a small amount of white vinegar on the swab can help dissolve the buildup—just let it dry completely before reinserting the battery.
Verify remote functionality. If your remote has an LED indicator light, check if it illuminates when you press a button. A light indicates the remote has power but might need reprogramming.
Reprogramming Your Garage Door Remote (If Needed)
Sometimes, replacing the battery can cause your remote to lose its programming connection with the garage door opener. Reprogramming is widespread with older models or when the power has been completely drained for an extended period.
When reprogramming is necessary:
- The Remote has power (LED lights up), but the door doesn’t respond
- Remote works inconsistently after battery replacement
- You’ve verified the battery is correctly installed and not defective
Basic reprogramming instructions:
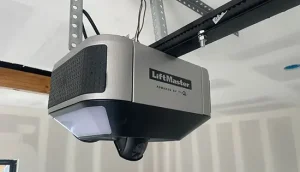
- Locate the “Learn” or “Program” button on your garage door opener unit (usually colored and found on the back or side of the motor housing)
- Press and release this button—an LED indicator will typically light up
- Within 30 seconds, press the button on your remote that you want to program.
- The opener’s light will blink, or the LED will turn off to confirm successful programming.
Remember that exact programming steps vary by manufacturer. If these general steps don’t work, consult your garage door opener manual for model-specific instructions.
How Often Should You Replace a Garage Door Opener Battery?
Maintaining a regular replacement schedule helps prevent inconvenient failures and ensures consistent operation. The frequency largely depends on how often you use your garage door:
Battery Life Expectancy by Usage Level
| Usage Frequency | Expected Battery Life | Recommended Check-Up |
| Light (1–2 uses/day) | 18–24 months | Once per year |
| Moderate (3–5 uses/day) | 12–18 months | Every 6–9 months |
| Heavy (6+ uses/day) | 6–12 months | Every 3–6 months |
Environmental factors also impact battery life. Extreme hot or cold temperatures can significantly reduce battery performance and longevity. If you live in regions with dramatic temperature variations, consider seasonal checks.
Safety & Storage Tips for Garage Remote Batteries
Proper remote handling and storage can extend battery life and prevent potential hazards:
Store remotes in dry, cool places. Excessive humidity can corrode battery contacts, while extreme temperatures reduce battery capacity. Keep your remote inside your home rather than in the garage when possible.
Avoid direct sunlight exposure. While your car’s dashboard might seem convenient, the greenhouse effect can create temperatures that damage the battery and remote circuitry. Instead, use a visor clip or console storage.
Prevent accidental button presses. Random pressing while in storage or a bag drains the battery unnecessarily. Consider removing the battery if the remote is being stored for extended periods.
Properly dispose of old batteries. Batteries contain chemicals that can harm the environment. Many hardware stores, electronics retailers, and recycling centers accept used batteries for proper disposal.
Should You Upgrade to a Smart Opener System?
If you find yourself frequently replacing batteries or wanting additional features, it might be time to consider upgrading to a smart new garage door opener system:
Benefits of smart openers include:
- Smartphone control eliminates remote battery concerns
- Integration with voice assistants like Alexa and Google Home
- Real-time notifications when your door opens or closes
- Remote monitoring capability to check if you left the door open
- Enhanced security features and access controls
An upgrade makes particular sense if your current opener is over 10 years old, you’re experiencing frequent mechanical issues, or you’re renovating your home with smart technology integration. While the initial investment is higher than a simple battery replacement, the convenience and security benefits often justify the cost.
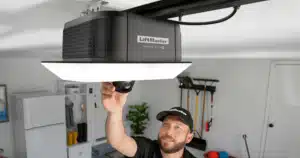
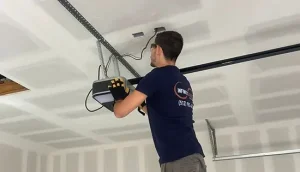
When to Contact for Professional Garage Door Help
While battery replacement is typically a simple DIY task, some situations warrant professional assistance:
Persistent remote issues: If you’ve replaced the battery, cleaned the contacts, and attempted reprogramming without success, there may be internal damage to the remote circuitry or a problem with the opener’s receiver.
Complete door non-responsiveness: The issue likely extends beyond the remote when the door won’t respond to any remote or wall-mounted controls.
Sensor or wiring problems Safety sensors showing error lights or visible damage to wiring require professional evaluation to ensure safe operation.
For these situations, contacting experienced technicians is the safest option. The experts at CCM Overhead Doors have the specialized tools and knowledge to diagnose and repair complex garage door system issues quickly and safely.

FAQs
How do I know if my garage door opener battery is dead?
Common signs of a dead garage door opener remote battery include the remote not responding when you press the button, the door only opening or closing intermittently, or requiring you to be very close to the garage for it to work. Sometimes, the indicator light on the remote might also be dim or not light up at all.
Can I use rechargeable batteries in my garage door remote?
Yes, you can typically use rechargeable batteries in your garage door remote, provided they are the correct type and voltage specified by the remote’s manufacturer. However, rechargeable batteries might have a slightly different discharge curve than alkaline batteries, potentially affecting the remote’s range or battery life indicator accuracy.
Do I need to reprogram my remote after a battery change?
In most cases, you do not need to reprogram your garage door remote after changing the batteries. The remote usually retains its programming information even when the power is temporarily removed for a battery replacement.
What happens if I put the battery in the wrong way?
If you put the battery in the wrong way in your garage door remote, it will likely not function, and in some cases, it could damage the remote’s circuitry. Always double-check the polarity markings (+ and -) inside the battery compartment before inserting a new battery.
How do I safely dispose of the old battery?
To safely dispose of the old battery in Cagayan de Oro, Northern Mindanao, Philippines, it’s best to look for designated battery collection points or recycling programs in your community. You can often find these at electronic stores, some supermarkets, or through local government initiatives focused on proper waste disposal. Avoid throwing batteries in regular trash as they can contain hazardous materials.
End Note
Don’t let a dead battery lock you in the rain or compromise your home’s security. Knowing how to replace garage door opener batteries is a simple skill that saves you time and frustration. For more complex garage door issues or considering an upgrade to an innovative system, CCM Overhead Doors is your trusted partner for all things garage doors—from remote troubleshooting to complete opener upgrades.
Our experienced technicians provide reliable, same-day service across the region. Learn more about our experts on the Meet the Team page or browse our Service Areas to see if we’re nearby. Curious about how we work? Visit our About Us page.
Schedule a service with CCM Overhead Doors today for a quick fix or a complete smart opener upgrade. We make garage door maintenance swift, safe, and hassle-free—just the way it should be.