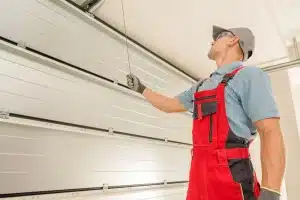
Seals for garage doors are essential to keep out the rain and wind as well as snakes, rodents, and bugs. Every garage door owner Oklahoma City OK is likely to have looked at the one you have and discovered it was dry-rotted or worn due to many years of usage. It is a movable door that wears out over time, and you’ll need to replace it at least once in a while. Its wear is caused by rubbing it on the ground, contact with dirt and it gets on the floor as the door closes it, the sun and cold, or physical tears in the seal can cause ways that it wears or rots it out.
The best part is that it’s an easy process and costs very little to accomplish. This tutorial focuses on modern door seals, which have been in use for more than 10 years and depend on an inclined track that is a double channel on the lower part of the door for mounting the seal. Some doors come with only one channel to seal and it will work on the doors. Older doors may be secured to the rear of the door’s lip and will require a Hammer and screws or nails to attach them. This channel system is commonly used in modern doors.
Here are the steps you need to replace your garage door seal:
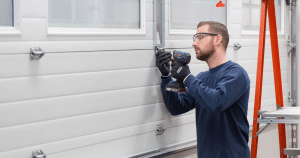
Step 1: Gathering Your Materials and Tools
There are only a handful of tools you’ll require to complete this job.
• Tape measure or any other method to determine the length of your door.
• Use shears for cutting the door seal to match the door.
The material will be put in the lower part of your garage door. It is recommended to start by collecting the necessary materials so that you do not need to stop to search for anything.
Step 2: Measure Everything and Get Your Seal Ready
Take a look at this image to discover the three possible values to order for your door seal.
Door Length: Use a tape measuring instrument and determine the length of your door.
Door Thickness: Look towards the end of your door and determine the thickness. They are typically 1 or 2 inches wide.
Channel Width: Now you have to determine the interior of your channel(s) to determine how large the seal lip must be. In general, the channel will be 5/16 inches or 3/8 inches and 1/4 inches… This is the measurement of how wide the edges of the seals are that will fit inside the channel.
Step 3: Step Three: Compare Your New Seal to Your Old
Once you’ve got your seal put it on a flat surface and proceed to take out your old seal. Lay it on top of the new seal and examine them.
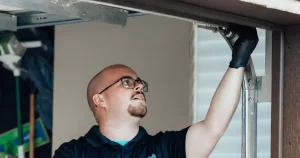
Step 4: Review the Mounting Method of Channels
The new seal is flat and needs to be folded inwards to form a half-circle to ensure that both ends with parallel edges can move down the channels. Certain doors only have one channel and you’ll need to purchase a seal that has only a “T” edge channel. There are two channels in most doors. The edge of my door shows the channels, as well as an illustration of the method of mounting the seal to fit the door.
Step 5: Pulling the Seal in the Channels down the Door Length
After you have your channels free of any debris or dirt, you can begin putting the new seal in. It’s quick and simple. You must pay attention and never take shortcuts.
- Begin at the other edge of the doors and insert the seal into the channels before folding it into its “C” shape which is needed.
- Once you’ve got it going then begin to push the seal along to the width of your Garage door. Fold it once it is in the channels of the door on the other side of the door that you began with.
- Continue until the channel’s length is filled.
Step 6: Trim and Secure Your New Seal to Fit Your Door
Once you’ve put the seal back into position, you will be able to look at the length of the door and confirm that everything is within the channels and everything is aligned correctly. Check the top of the door to confirm that the seal is located at the top of your channels.
It should be possible to have some extra length for the new seal. Apply a bit of rubber cement on the new seal to channels at the ends to stop it from leaking through the channel’s sides.
Step 7: Inspect Your Work and Finalize It
Get your scissors and reduce the new seal of the door so that it can stick out from the sides of the door by around 1/2 inch each. This allows the seal to move without leaking.
You are now able to open your garage door and examine it for gaps and fitment. If your garage door is experiencing problems, such as gaps, you may need to consult a professional for garage door repair and follow your opener’s instructions to address the issue.
Hope this provides you with the confidence to tackle this job. It was an easy task and the parts are accessible and affordable.