Are you tired of struggling with a broken garage door emergency pull on your garage door? Don’t worry! We’ve got you covered with this step-by-step guide to help you reattach it like a pro. Whether you’re a handyman looking for quick fixes or a DIY enthusiast eager to learn something new, prepare for an engaging journey that will have your garage door back in working order in no time. Say goodbye to frustrating moments and say hello to smooth operations – let’s dive into the world of garage door repair!
When a garage door emergency pull is disconnected, figuring out how to reattach it can be frustrating. However, understanding the function of the emergency pull can help make the process easier.
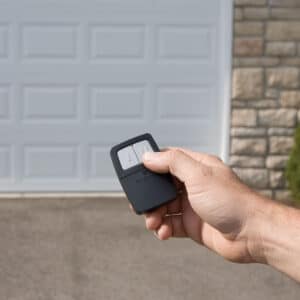
The garage door emergency pull is designed to be used in an emergency, such as if the power goes out and the garage door opener is not working. You can manually open or close the garage door by pulling on the cord.
Importance of Regular Maintenance of Garage Doors
It is essential to regularly maintain your garage door and perform any necessary repairs to keep it functioning correctly. A garage door emergency pull can be a lifesaver, so it is essential to know how to reattach it if it becomes detached. This guide will show you how to reattach a garage door emergency pull to be adequately prepared.
Regular maintenance of your garage door, including timely garage door repair, is essential for several reasons. First, it will help ensure that the door functions correctly and safely. Properly working garage doors can help prevent injuries from door failure or malfunctioning. Additionally, regular maintenance and repairs can help extend your garage door’s life, saving you money on costly emergency repairs in the future. Finally, regular maintenance of your garage door will help keep it looking good and presentable.
Identifying the Problem: When Your Garage Door Pull Disengages
If you find that your garage door pull has disengaged, there are a few things you can do to try and reattach it. First, check the condition of the chain. If the chain is broken or frayed, it must be replaced. If the chain is in good condition, check to see if the brackets that hold the chain are loose. If they are, tighten them with a screwdriver. Check to see if the emergency release handle is engaged correctly.
If you’re having trouble with your garage door pull, it’s essential to identify the problem before attempting to fix it. There are several possible reasons why your garage door pull might disengage, including:
- Is the chain broken or has it come loose from the sprocket
- The springs are damaged or have come loose from the brackets
- The cables are frayed or have come loose from the pulleys
Once you’ve identified the problem, you can begin troubleshooting and taking steps to fix it.
Tools and Materials Needed for Reattaching a Garage Door Pull
- Tools and Materials Needed for Reattaching a Garage Door Pull:
- Hammer
- Nails
- Pry bar
- Drill
- 1/8″ drill bit
- Screwdriver
- Socket wrench set
- Adjustable wrench
- Pliers
- Tape measure
- Level
- Garage door pull
- Screws or bolts
Safety Precautions Before Starting the Reattachment Process
Before starting the reattachment process, there are a few safety precautions that you should take. First, make sure that the power to the garage door opener is turned off. Next, disconnect the garage door opener from the garage door by pulling the release cord. Once the opener is disconnected, you can safely begin reattaching the garage door emergency pull cord.
When reattaching the pull cord, make sure to wear a pair of gloves and safety glasses to protect yourself from any debris or sharp edges. Once the cord is reattached, ensure it is entirely secure before testing the garage door. Finally, keep your hands and feet away from any moving parts while testing the door.
After the Reattachment Process
Once the reattachment process is complete, you should take a few steps to ensure that your garage door opener is working correctly. First, you should check that all connections and wires are secure. You should also check that all of the components are functioning correctly, such as the motor and sensors. Finally, if needed, adjust any settings on the garage door opener to ensure optimal performance.
Once these checks have been completed, your garage door opener should be working properly again. If you still experience any issues with your garage door opener, consider contacting a professional for expert garage door repair assistance.
Step-by-Step Guide to Reattaching a Garage Door Emergency Pull
One common issue is the detachment of the garage door emergency pull, a safety feature designed to manually open or close the door in case of power outages or operational failures. If your garage door emergency pull has detached from the wall, don’t worry – it’s easy to reattach! Just follow these simple steps:
Step 1: Safety First
Before you start, it’s crucial to prioritize your safety. Ensure your garage door is fully closed to prevent any accidents during the garage door repair process. Also, wear a pair of safety goggles and gloves to protect yourself from dust and sharp objects.
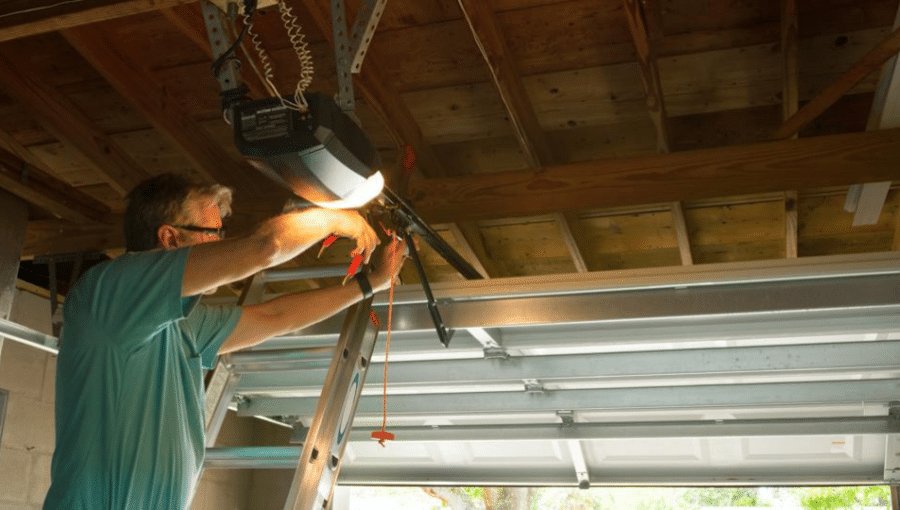
Step 2: Gather Your Tools
For this DIY task, you’ll need a step ladder, a pair of needle-nose pliers, and a flashlight if the lighting in your garage isn’t sufficient. You might also need a screwdriver or a wrench, depending on the model of your garage door.
Step 3: Understand Your Garage Door Mechanism
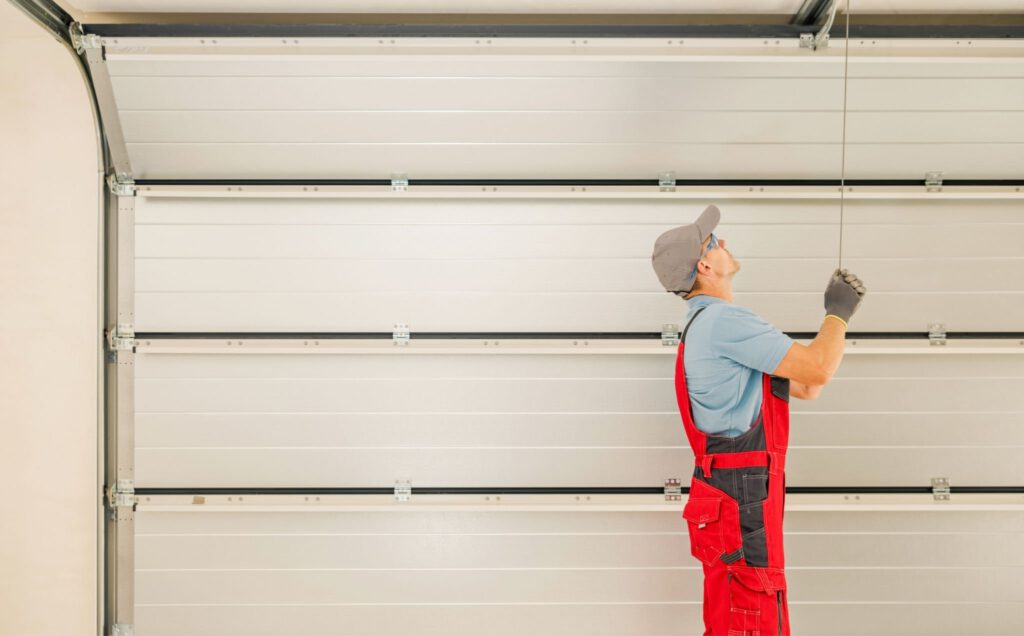
Before you delve into reattaching the garage door emergency pull, familiarize yourself with your garage door mechanism. The emergency release cord typically connects to a lever that disengages the trolley, allowing you to manually move the garage door. Look for this lever, usually situated along the guide track of the door.
Step 4: Locate the Disconnected Pull Cord
The next step is locating the pull cord. It’s usually a red rope with a handle at the end, dangling from the guide track. If it’s not easily visible, use your flashlight to help spot it.
Step 5: Reattach the Pull Cord
Now comes the actual reattachment process. Climb the step ladder until you’re level with the track and the lever. The end of the garage door emergency pull cord should have a knot or a loop designed to connect to the lever.
Take your needle-nose pliers and thread the loop or knot of the pull cord over the lever’s catch. Use the screwdriver or wrench to secure the connection if your model requires it. Once done, gently tug on the cord to confirm it’s secured.
Step 6: Test the Garage Door Emergency Pull
The final step involves testing your handiwork. Pull down on the emergency cord. The lever should disengage from the track, allowing you to move the door manually. After testing, remember to return the door to its original closed position.
Step 7: Regular Maintenance
Regular maintenance can prevent future disconnects. Ensure the pull cord is not frayed or worn, and replace it if necessary. Test the emergency release regularly to make sure it’s working correctly.
Don’t let the complexity of your garage door intimidate you. By understanding its operation and how to fix minor issues like reattaching the garage door emergency pull, you’re well on your way to being a DIY garage door repair expert.
Troubleshooting: Common Issues and Solutions After Reattachment
If your garage door emergency pull is not working correctly, there are a few common issues that you can check. First, make sure that the cord is not frayed or damaged. If it is, you will need to replace it. Next, check if the cord is disconnected from the garage door opener. If it is, simply reconnect it. If the garage door emergency pull is still not working correctly, you may need to adjust the tension on the cord.
If you are experiencing problems with the garage door not opening or closing correctly, you may need to adjust the tension on the springs. Ensure the springs are correctly connected and adapted to the correct pressure. If this does not fix the issue, you may need to consider garage door repair or replace them.
If your garage door opener is not working, check all of its connections and make sure that everything is plugged in correctly. You also want to ensure all the switches and settings are set correctly. If everything appears to be in order, but it still isn’t functioning correctly, then you may need to replace it or get it serviced by a professional.
Maintaining Your Garage Door Pull: Tips and Tricks
If your garage door emergency pull has detached from the wall, don’t worry – it’s an easy fix! Simply follow these steps to reattach it:
1. First, identify the screws or nails that initially held the pull in place if the holes are still visible, great! If you need a stud finder to locate them, you may need a stud finder to find them.
2. Once you know where the holes are, predrill new ones if necessary. This will make it easier to screw in the new fasteners.
3. Next, position the garage door emergency pull back and secure it with screws or nails. Be sure to use at least two fasteners for stability.
4. Test the pull to ensure it’s securely attached and working correctly.
5. Finally, if the garage door emergency pull is still loose or wobbly, you may need longer screws or additional fasteners to ensure it’s securely fixed.
These simple steps will help you maintain your garage door pull and keep it working correctly for years.
When to Call a Professional: Understanding the Limits of DIY Repairs
There are some garage door repairs that you can do on your own, but there are also times when it’s best to call a professional. Knowing when to call can save you time, money, and frustration.
One of the most important things to understand is the difference between a mechanical problem and an aesthetic one. Aesthetics refers to the door’s look, while mechanics refers to the function. If your door isn’t opening or closing correctly, that’s a mechanical issue that requires professional help. However, if your door is dented or scratched, that’s an aesthetic issue you can repair.
Another thing to consider is whether or not the damage is extensive. If your garage door is severely damaged, it’s best to call a professional for garage door repair. They have the experience and equipment necessary to make repairs quickly and efficiently.
You should also consider your skill level. If you don’t feel confident in your ability to make repairs, it’s always best to call a professional. They can assess the situation and guide you on how to proceed.
Call CCM Overhead Doors
CCM Overhead Doors is the leading provider of high-quality garage door services in Oklahoma City, OK and overhead door Proudly Serving OKC, Norman, Moore, Mustang, Yukon, Edmond & Shawnee. We offer our customers a wide variety of options, including garage door emergency pull cords, to ensure that their garage doors function properly. Our team of experts is available 24/7 to help you with any questions or concerns about your garage door. Call us today to learn more about our services!